

Create your first agent step-by-step
An agent is the combination of voice, language model, instructions and flow. Follow the steps below to create your first one.
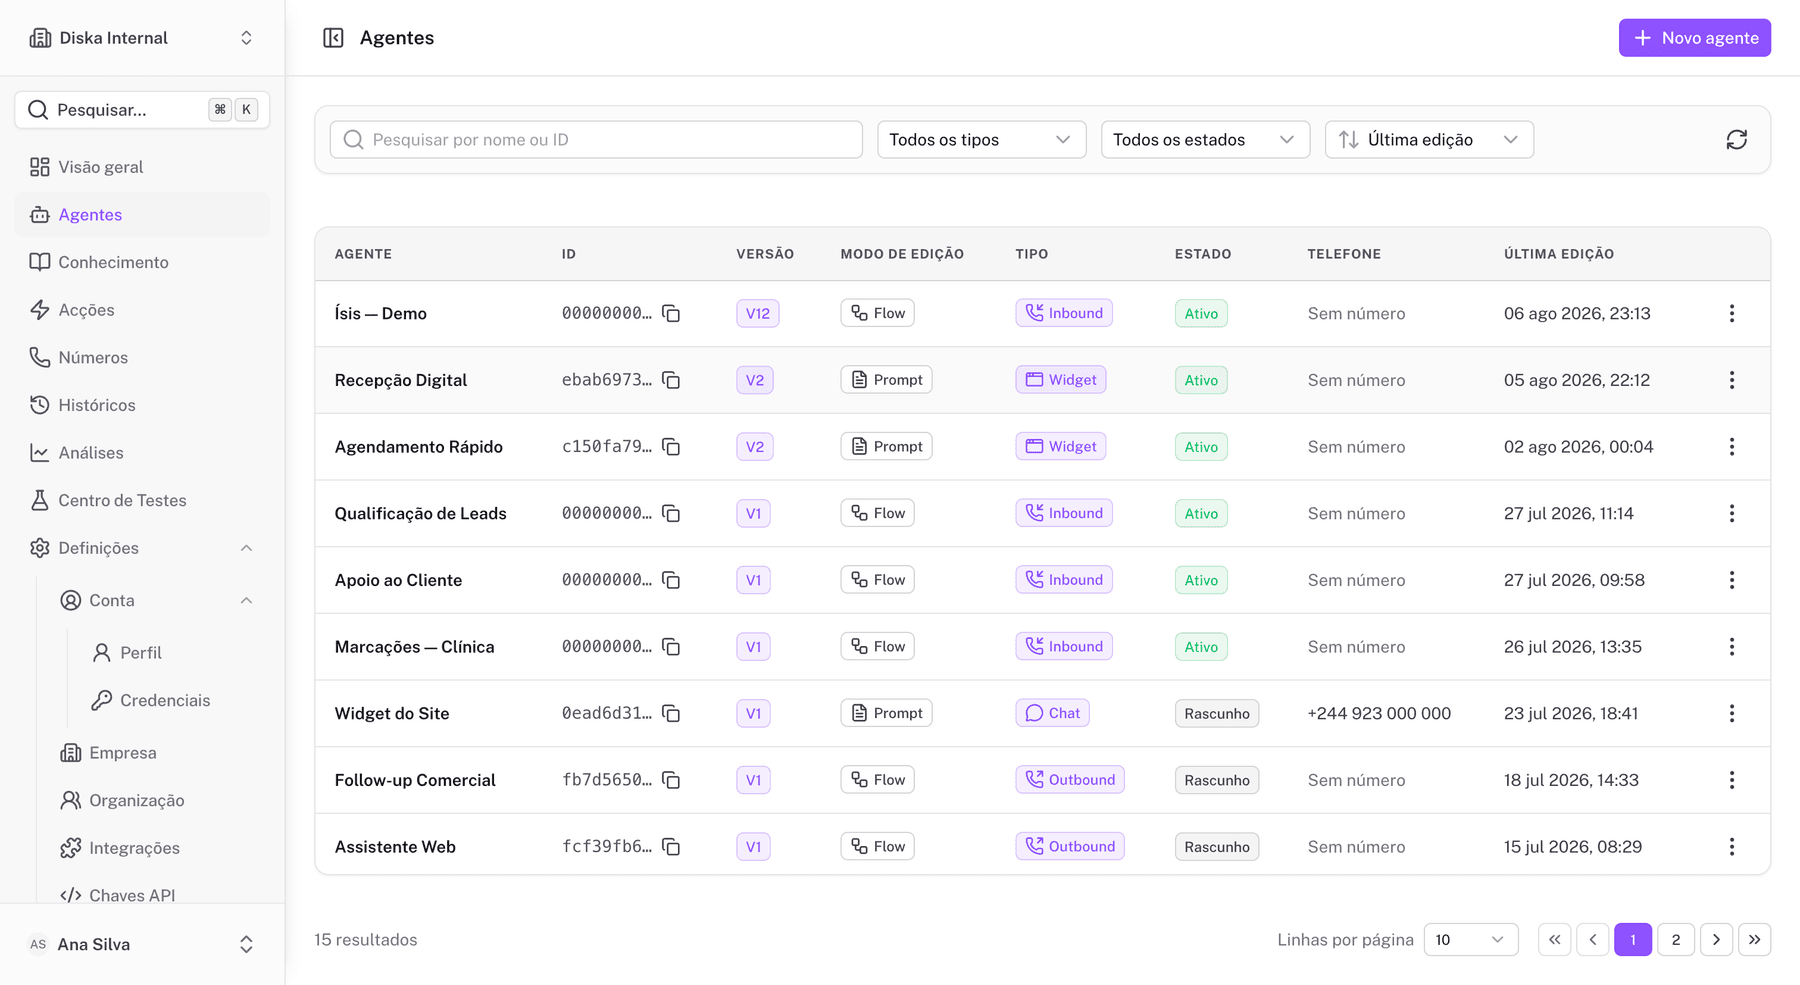
Step 1. Open Agentes
In the side menu, click Agentes (Agents) and then Novo agente (New agent).
Step 2. Choose a template
Diska provides preconfigured templates. Choose one close to your use case (e.g., Support, Sales, Booking). The template creates:
- an agent with a predefined voice and model;
- a basic main flow;
- an empty Knowledge Base (optional).
Step 3. Configure voice and model
In the agent editor, open the Definições (Settings) panel and its Voz (Voice) section.
| Field | Recommendation |
|---|---|
| Voice | Five European Portuguese voices: Leonor, Matilde, Madalena, Maitê and Heitor. This is the only voice setting a call ever uses. |
| Patience | How long the agent waits before assuming the caller has finished. Low answers faster; high tolerates someone thinking mid-sentence. |
| Base instructions | Define the agent's tone, objective and limits. |
Step 4. Build the flow
The Flow Builder canvas opens with the main flow already created:
Main flow → Before conversation → Greeting → Next step (placeholder)
Replace the placeholder with Conversation Nodes, messages, transfer or booking nodes as needed. See the Flow Builder section for details.
Step 5. Add knowledge (optional)
If the agent needs to answer based on documents, go to Knowledge Base, add sources and click Sync.
Step 6. Save and test
Click Save. Then click Testar → Web Call to talk to the agent in the browser.